Applicable products
√ Cortex v2.x
√ Cortex 365 v2.x
Prerequisites
- An Okta account with an active subscription
- Rights in Okta to Create an Add Integration
- Rights in Okta to Add an Authorization Server
- Administration and Security access granted in Eos Cortex
Overall Steps
Throughout this solution, "Eos Cortex" and "Eos Cortex Web API" are used to clearly distinguish between the two Okta 'apps'. These two apps may be named accordingly, to align with your company standard, etc.
- Create the Okta App Integration: Eos Cortex
- Add the Okta Authorization Server: Eos Cortex Web API
- Configure the Token (claim)
- Add permissions to the Eos Cortex app to access the Web API app
- Record the configuration in Eos Cortex > Administration > Security > Authentication settings, and test.
The following values will be collected during the Okta apps setup, and used in Step 3.
Issuer URL: [from the Okta > Authorization Server]: https://integrator-*******.okta.com/oauth2/************F5rlx698
Audience: [from the Okta > Authorization Server]: cortex.v2.api
Client ID: [from the Okta > Application > Client ID]: ************1dvlN698
Client secret: [not required]
Scopes: openid profile email
1) Add the Eos Cortex application... (ex. "Eos Cortex")
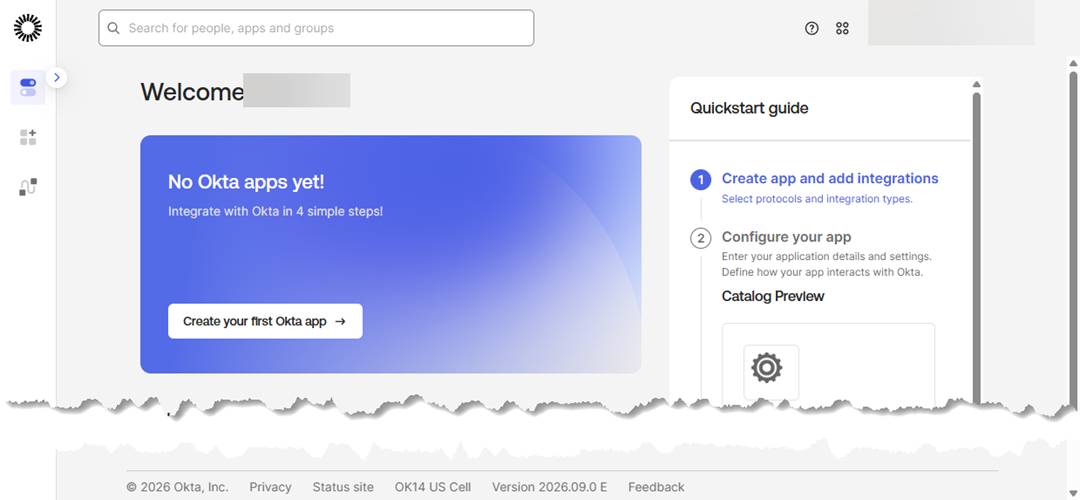
- Sign in to the Okta Admin Dashboard
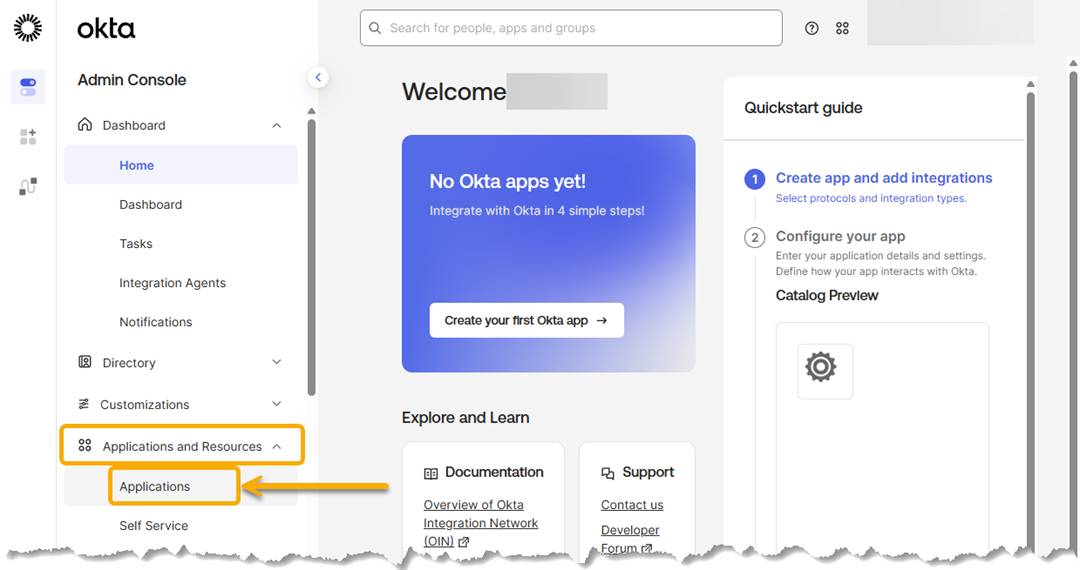
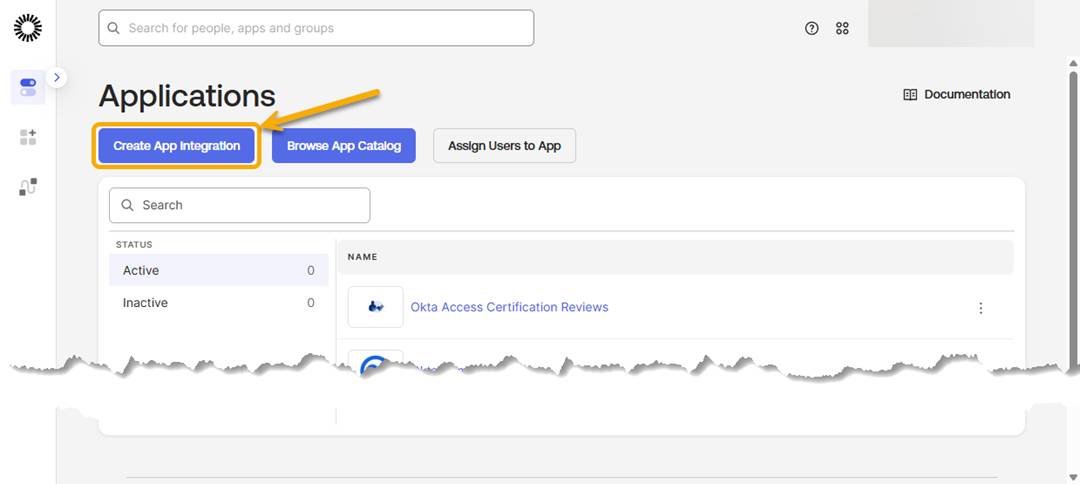
- Browse to Applications and Resources > Applications, and select Create App Integration.
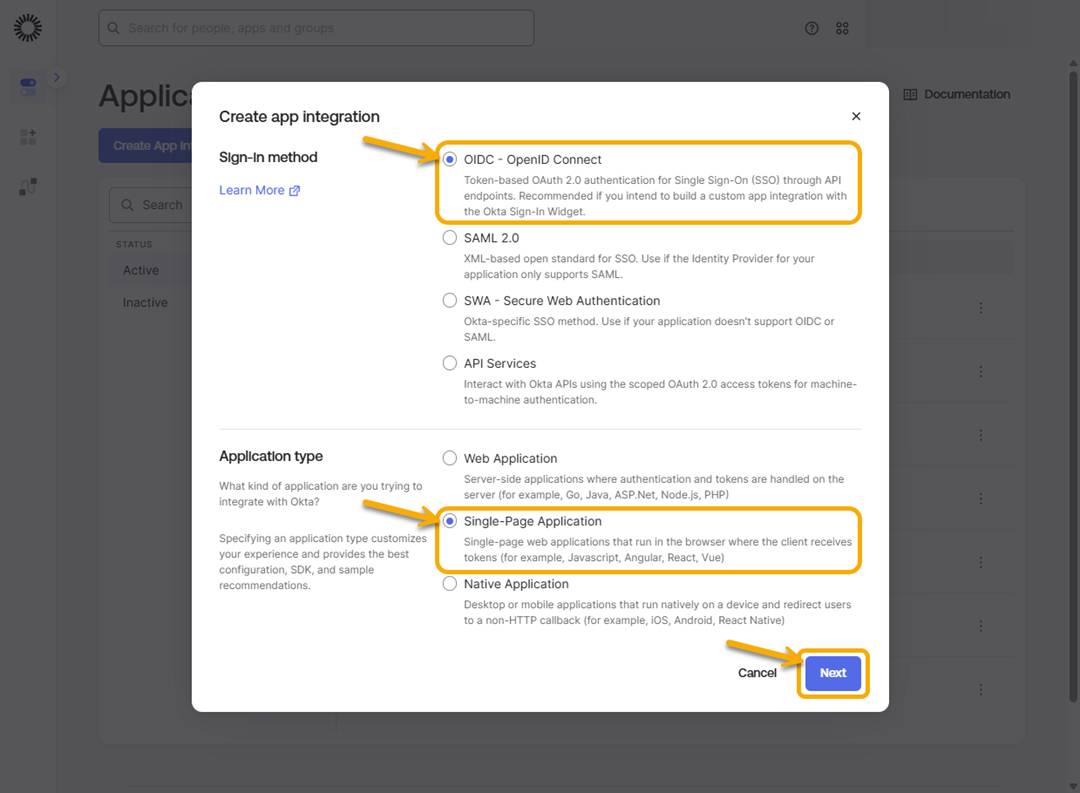
- At the Create app integration dialog, select OIDC - OpenID Connect, and for the Application type, select Single-Page Application (SPA)… then select Next.
- At the New Single-Page App Integration dialog…
App integration name, enter "Eos Cortex"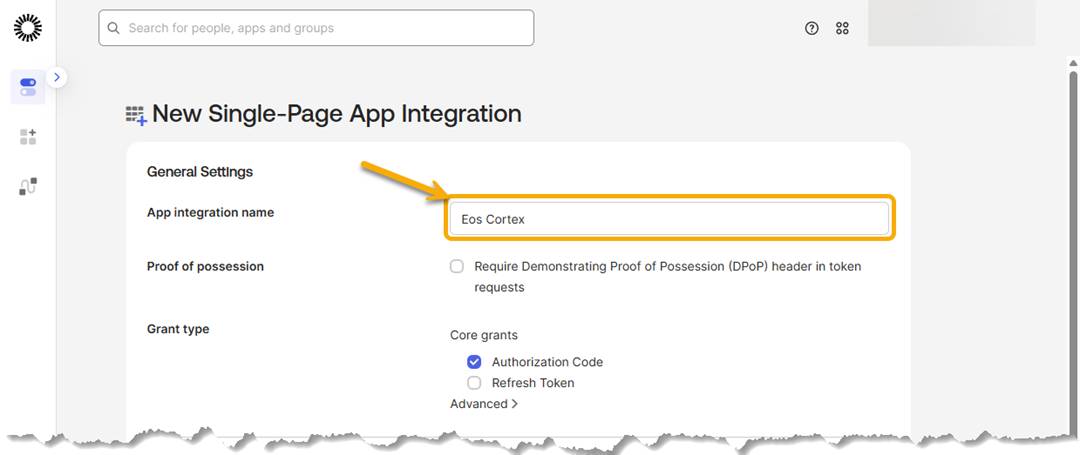
From your Eos Cortex tenant, retrieve your Sign-in and Sign-out URIs.
Example: Navigate to Eos Cortex > Administration > Security > Authentication…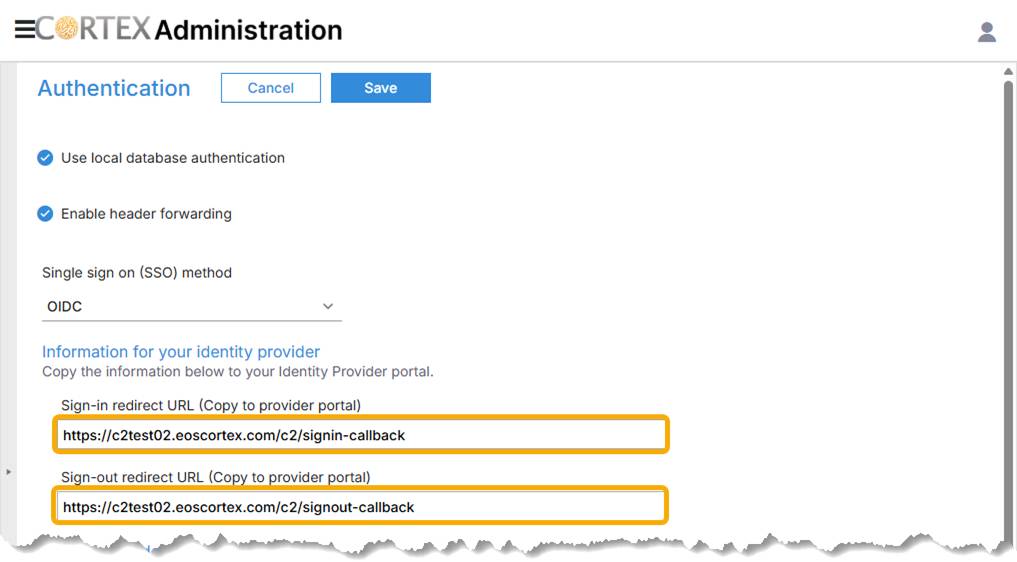
Enter the required Sign-in redirect URIs and Sign-out redirect URIs from Eos Cortex > Administration > Security > Authentication…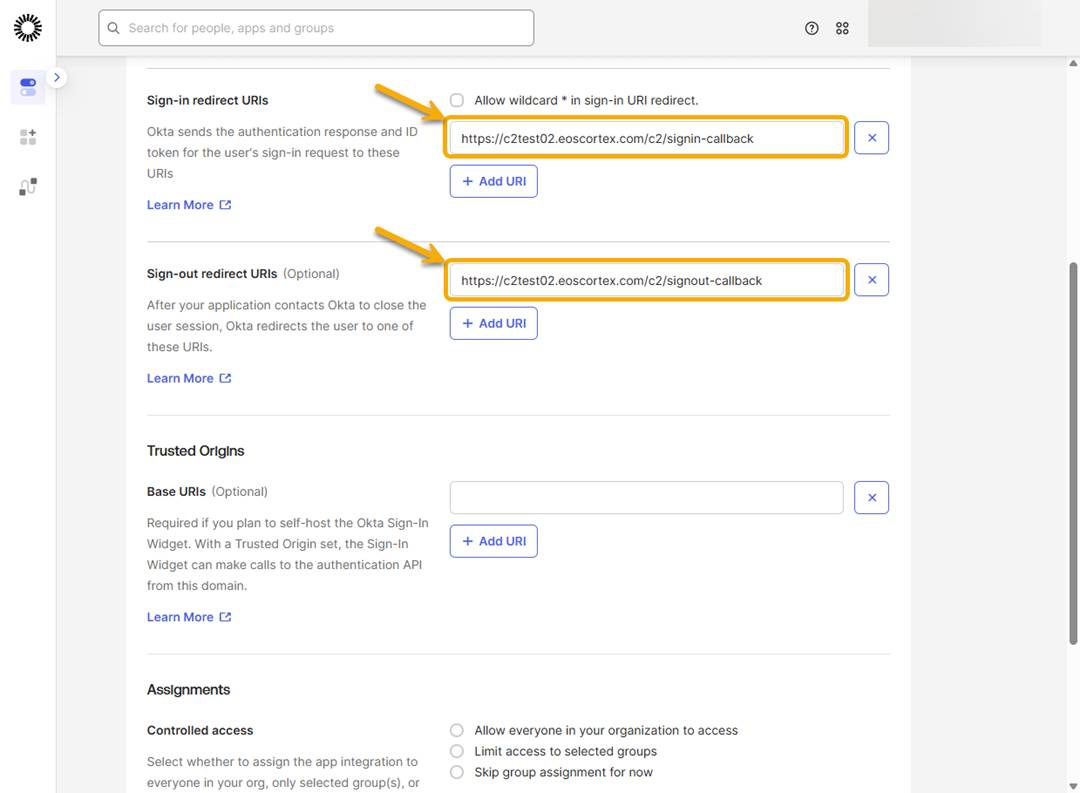
Leave Trusted Origins > Base URIs (Optional) blank.
Set Assignments > Controlled access, as required by your organization. (consult your Okta representative for more information)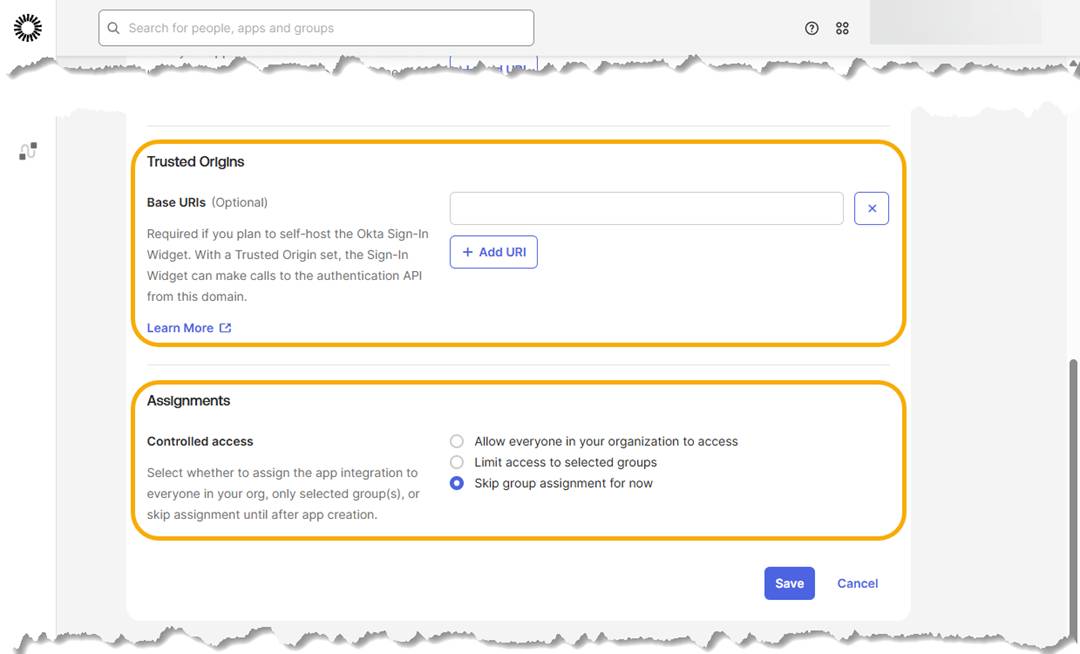
select Save…
- At the General tab, select the pencil to update the application logo…
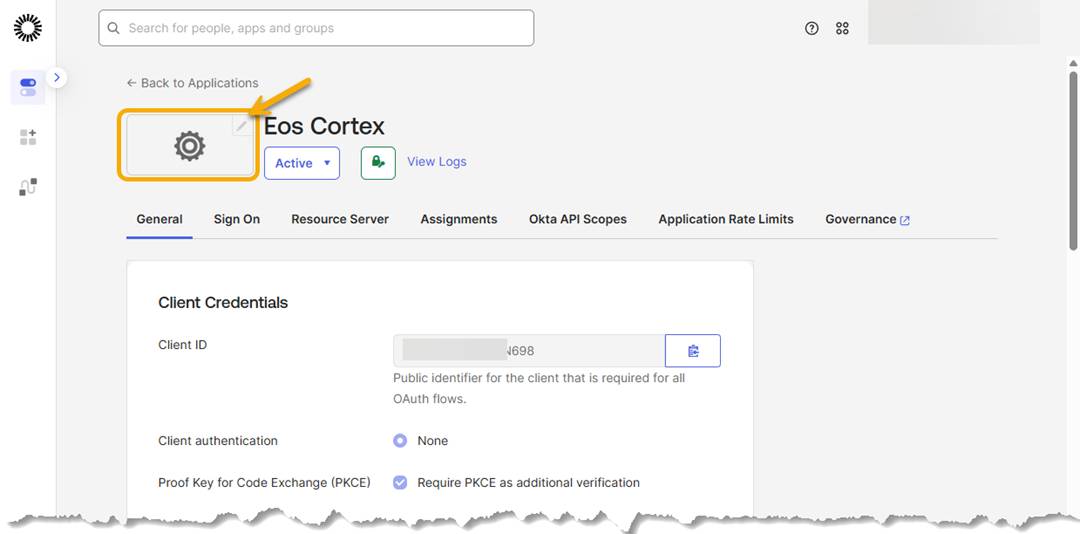
Browse and select the Eos Cortex logo (see the bottom of this solution for the attached image file)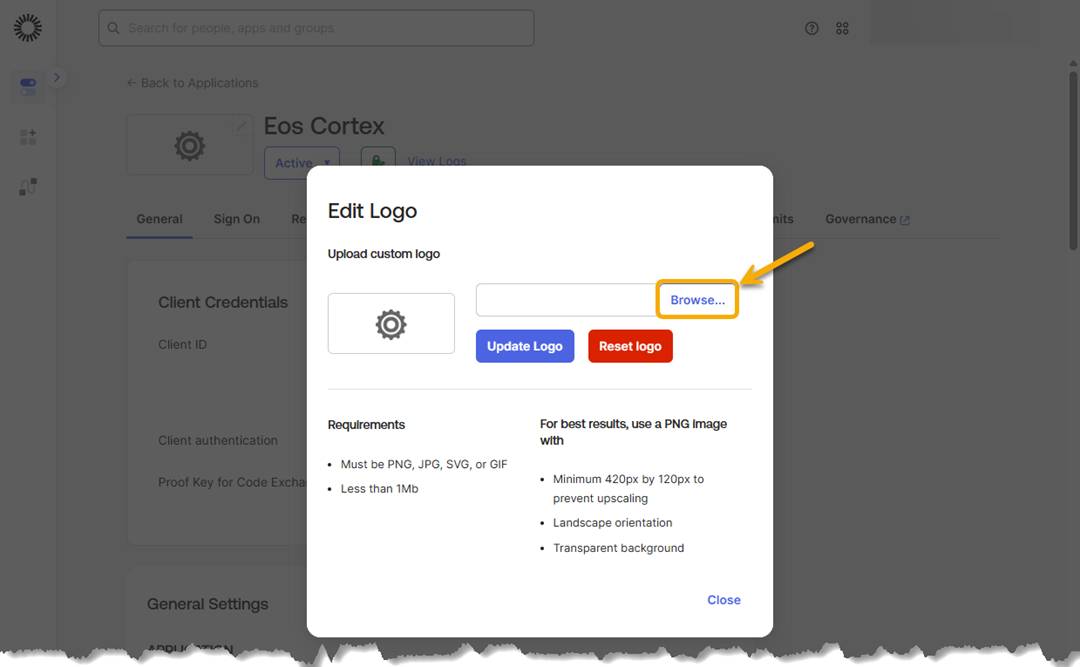
And select Close…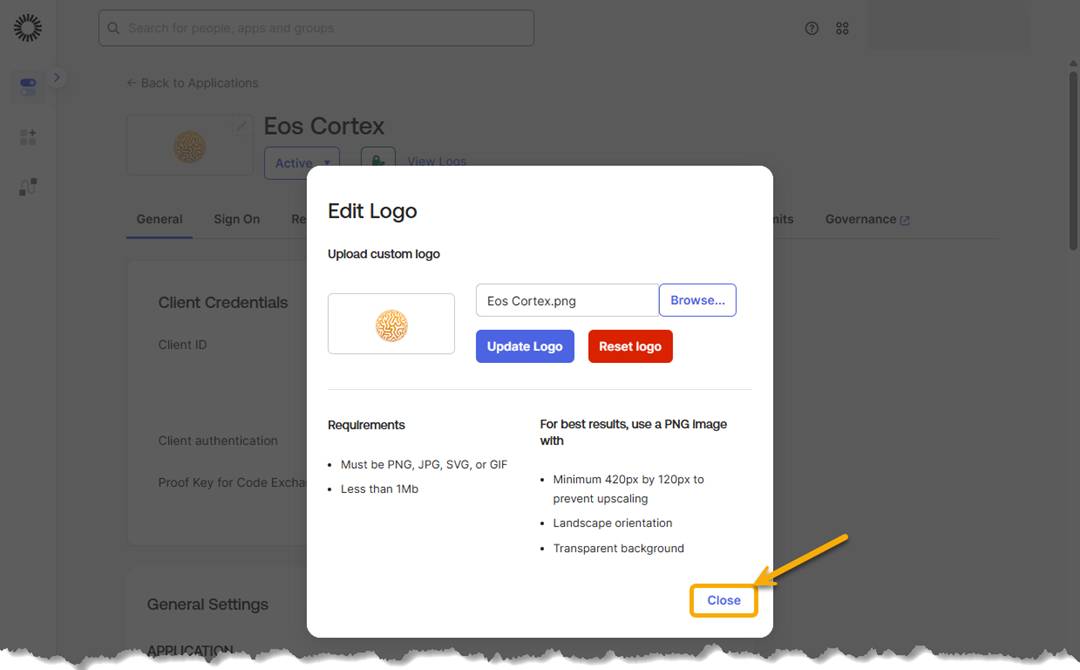
- At the Assignments tab, select the Assign button…
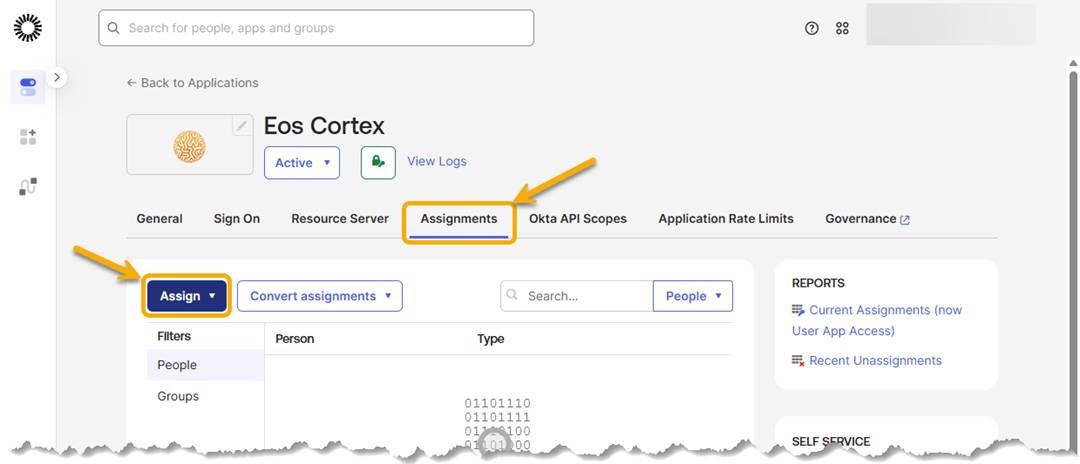
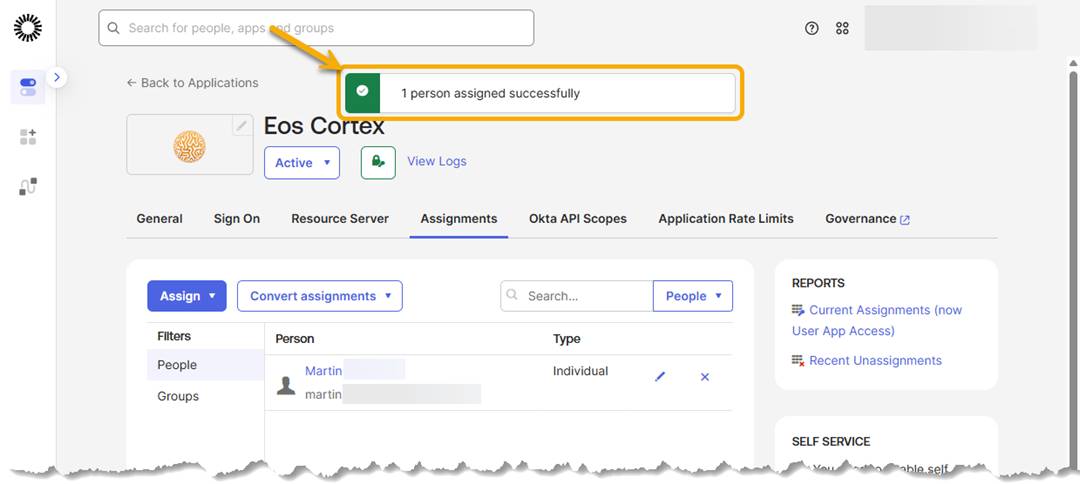
Search for, Assign the user (or group), and select Done.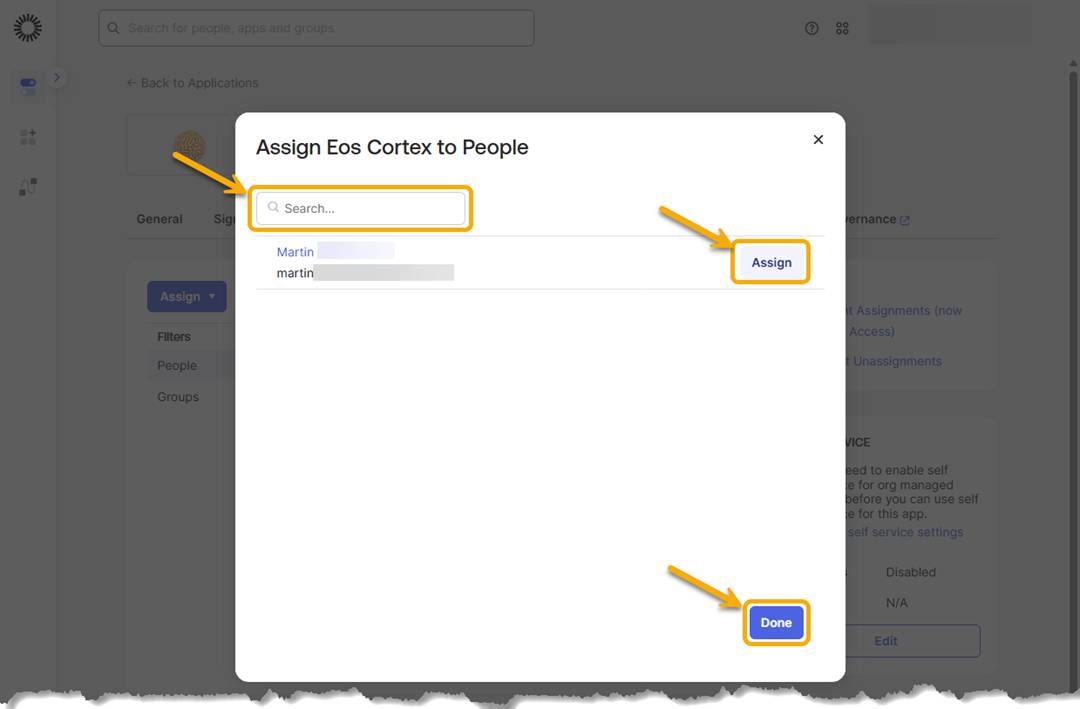
2) Add the Eos Cortex API (Authorization Server)... (ex. "Eos Cortex Web API")
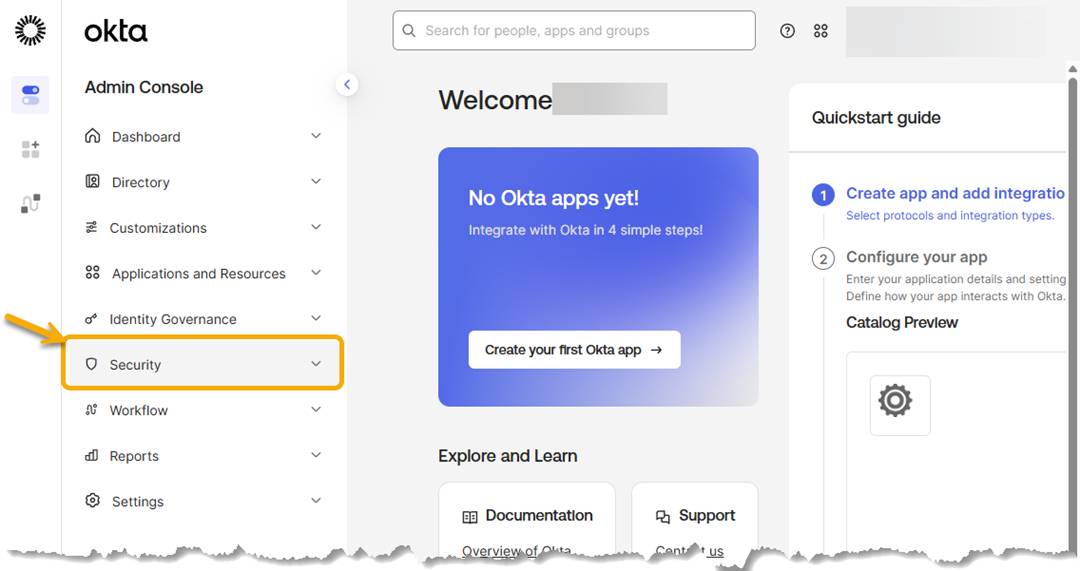
- From the Okta Dashboard, navigate to Security > API…
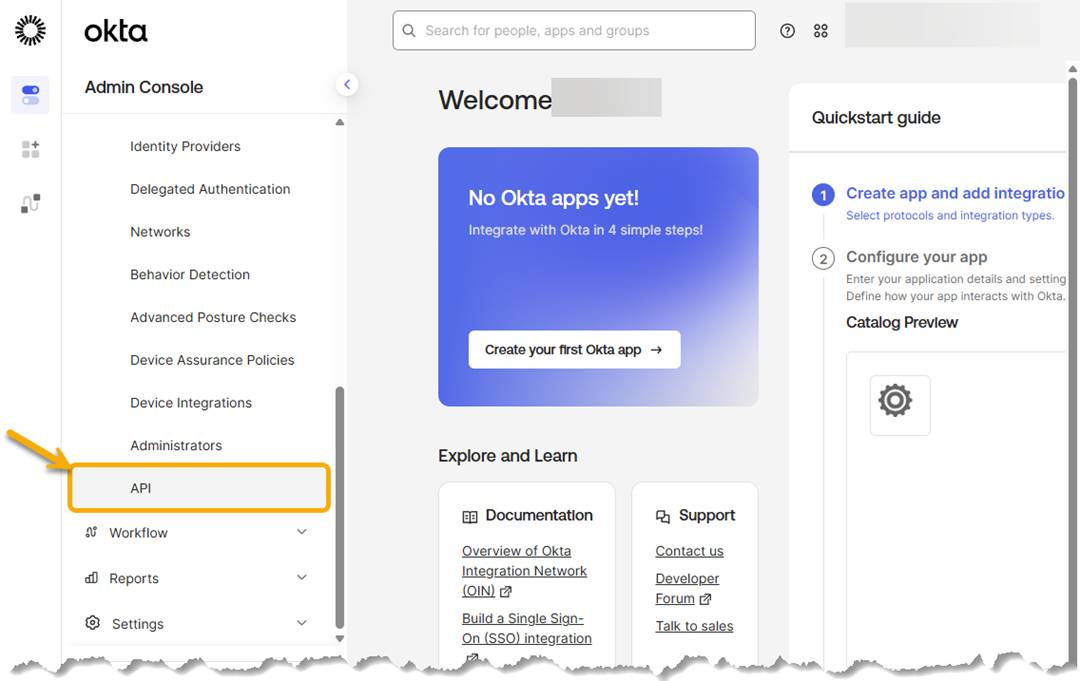
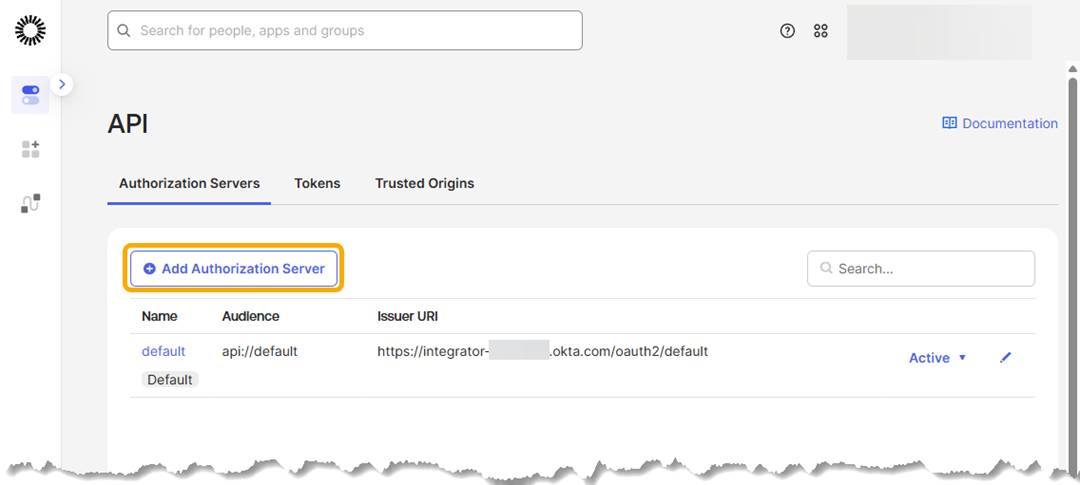
- At the API dialog, select Add Authorization Server…
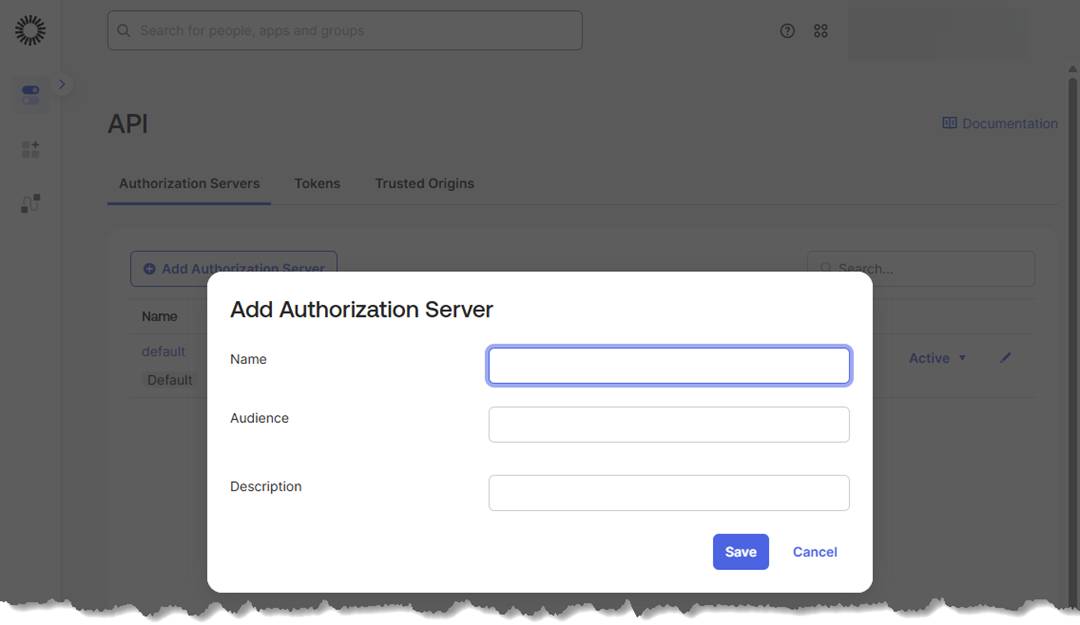
- At the Add Authorization Server dialog, enter the following:
- Name: Eos Cortex Web API
- Audience: cortex.v2.api
- Description: Eos Cortex Web API
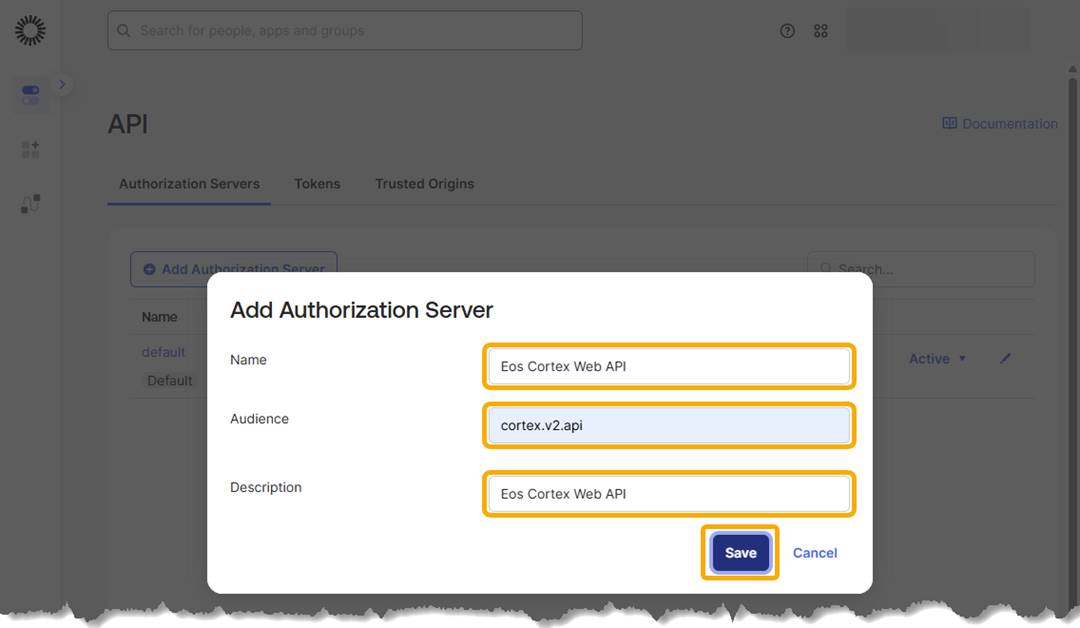
And select Save…
Example: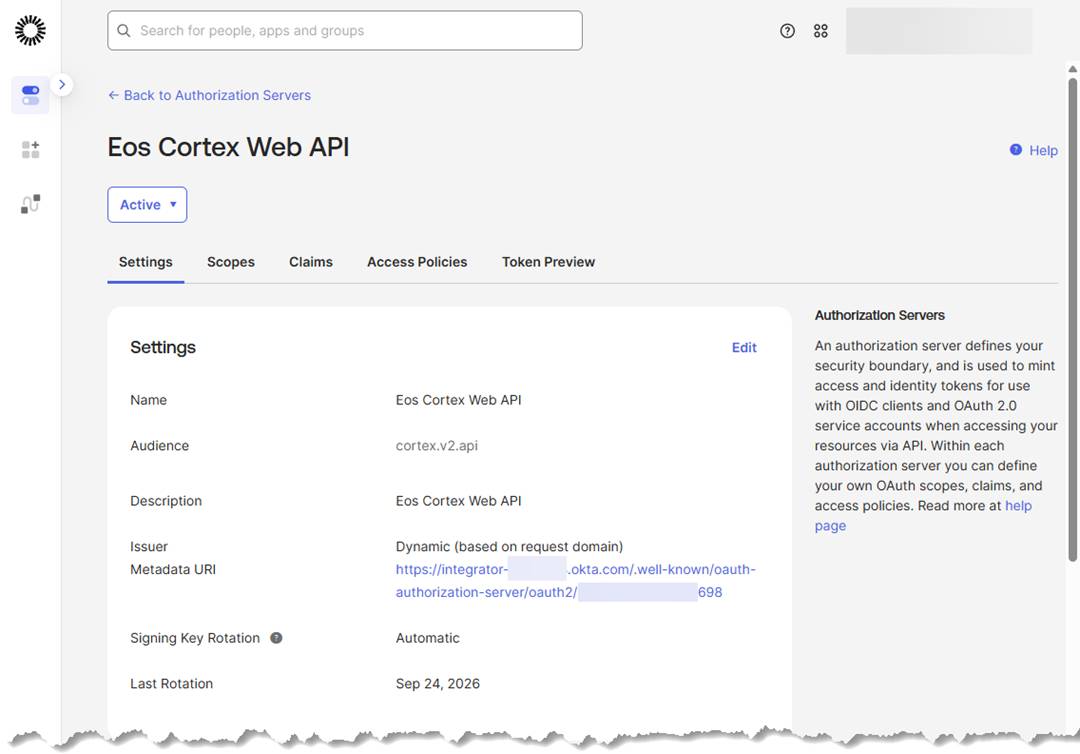
- At the Eos Cortex Web API, select the Access Policies tab, and select App Policy…
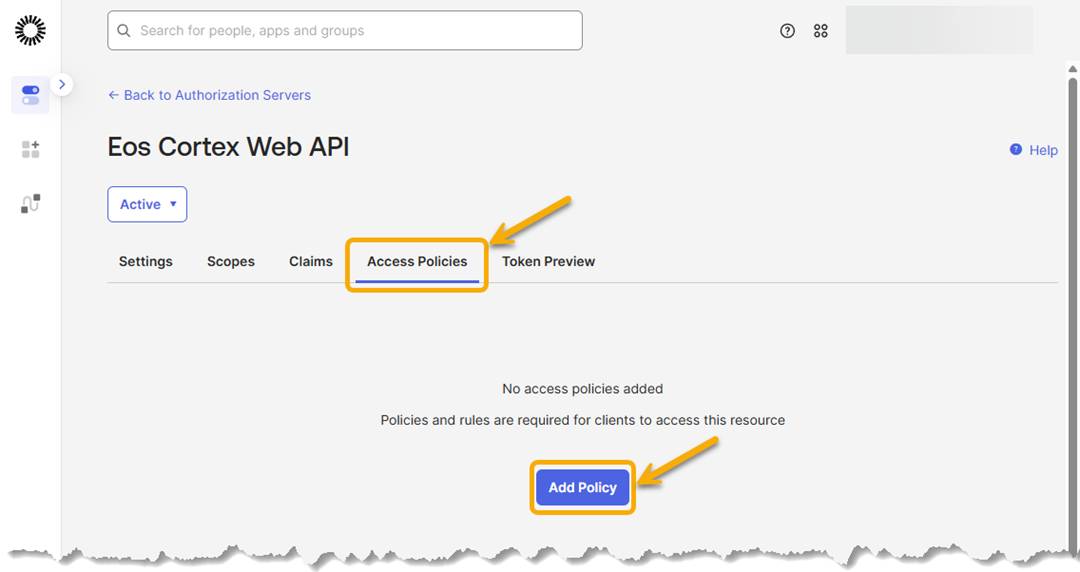
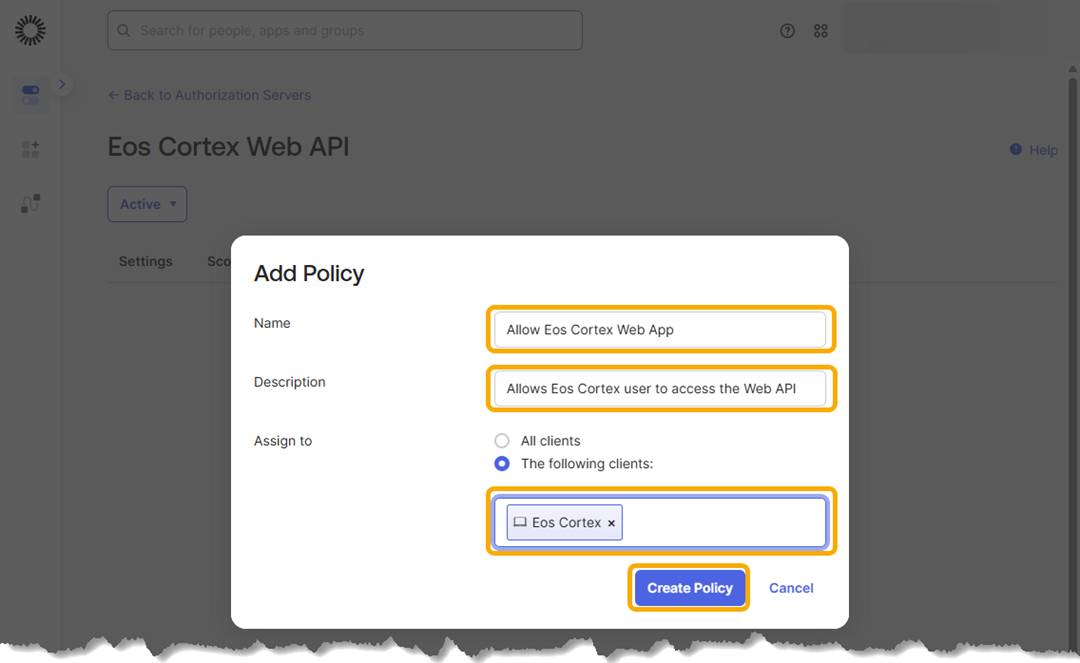
At the Add Policy dialog, enter the following:- Name: Allow Eos Cortex Web App
- Description: Allows Eos Cortex user to access the Web API
- Assign to: The following clients: Eos Cortex (the integration application added in step 1 above)
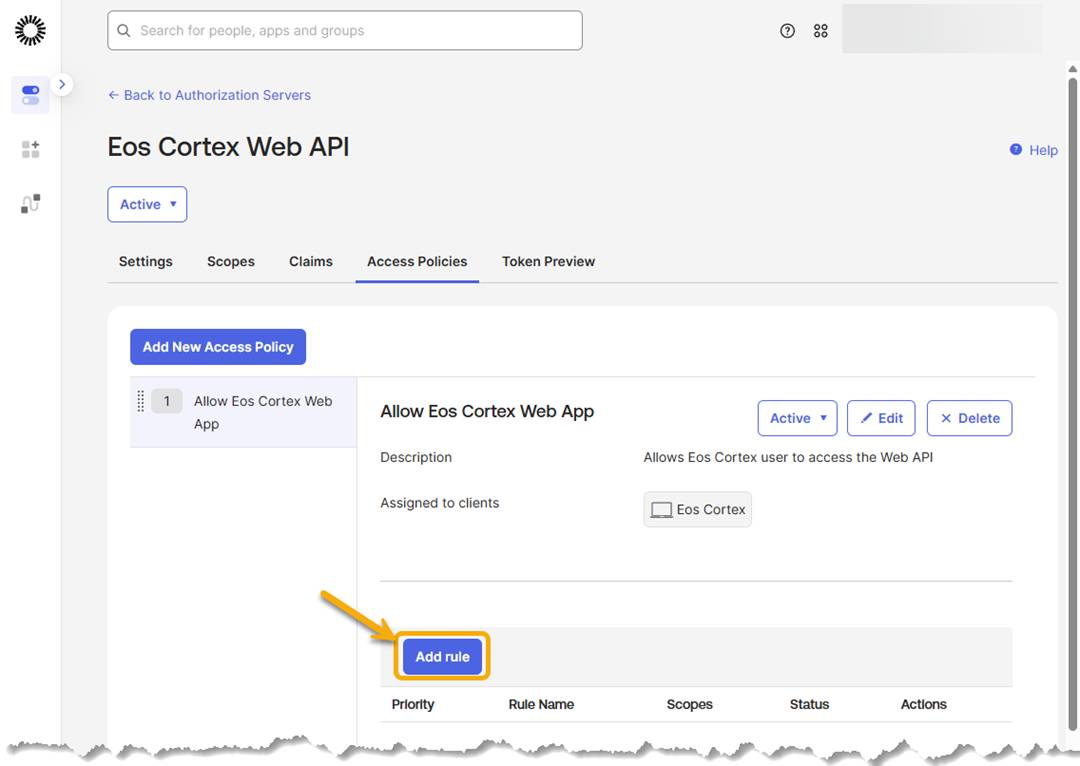
- At the Eos Cortex Web API > Access Policies tab… select Add rule…
Enter "default" in the Rule Name, accept the defaults (or adjust per your organization's guidelines), and select Create rule…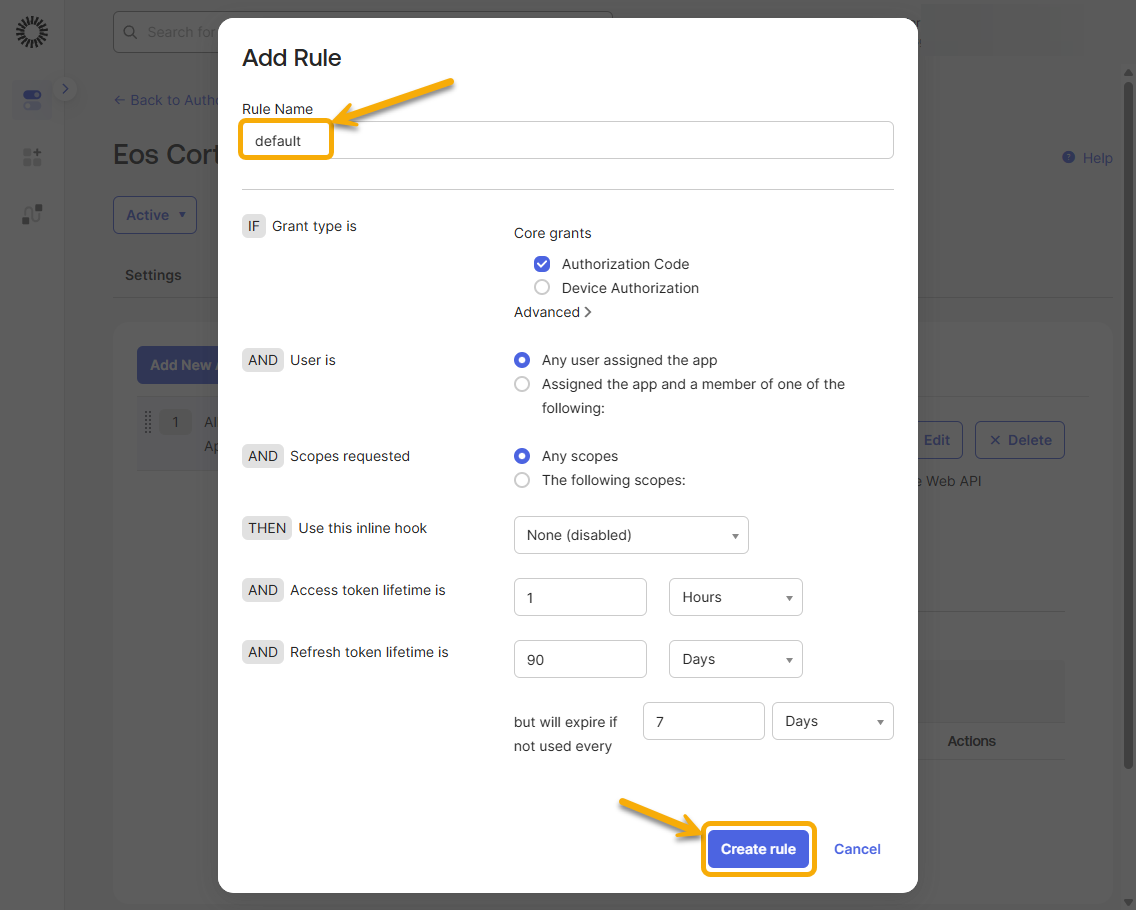
3) Record the configuration in the Eos Cortex > Administration > Security > Authentication settings, and test.
- Navigate to your Eos Cortex tenant, and log in with an account that has Security permissions.
- Navigate to Administration > Security > Authentication…
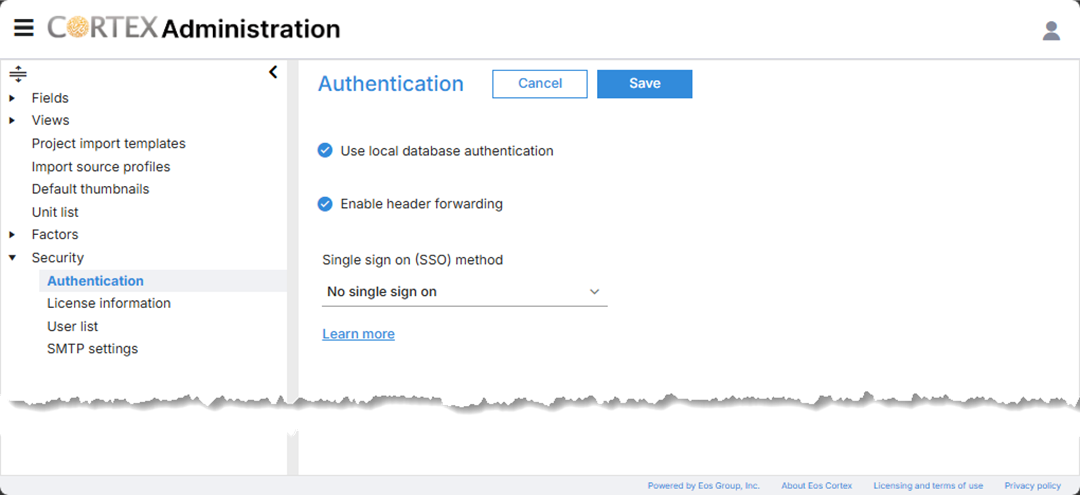
- At the Authentication dialog, select OIDC from the Single sign on (SSO) method dropdown.
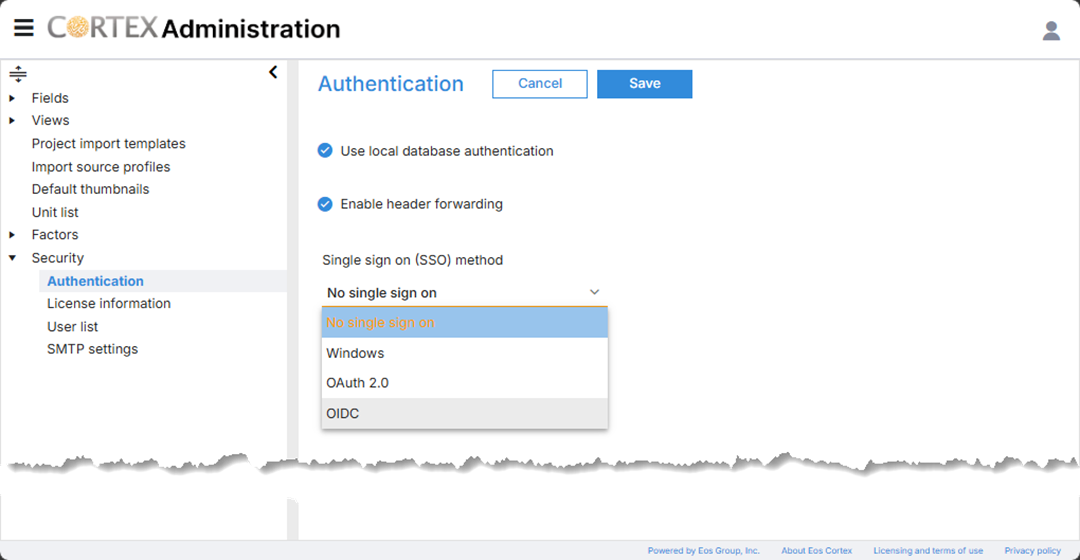
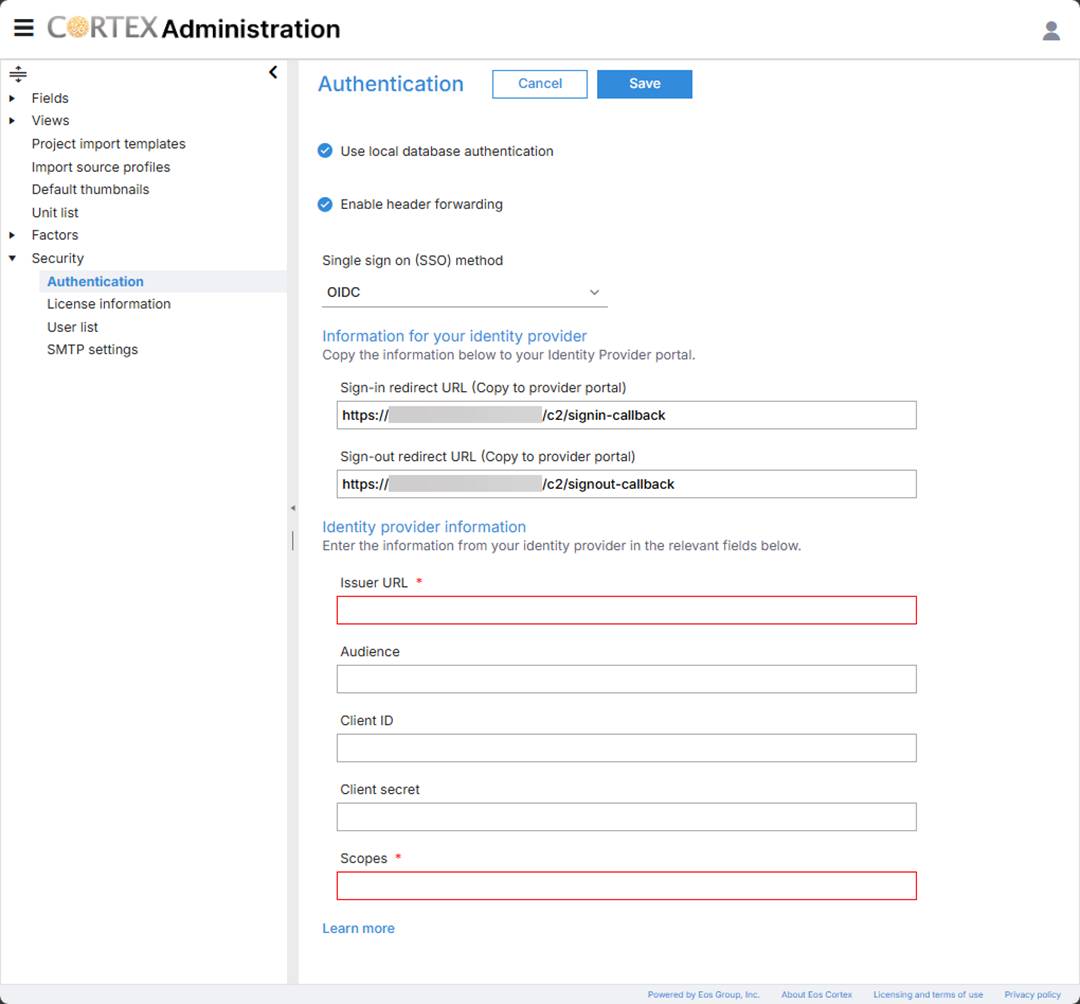
- Enter the following information into the required fields, and select Save.
Issuer URL: [from the Okta > Authorization Server]: https://integrator-*******.okta.com/oauth2/************F5rlx698
Audience: [from the Okta > Authorization Server]: cortex.v2.api
Client ID: [from the Okta > Application > Client ID]: ************1dvlN698
Client secret: [not required]
Scopes: openid profile email
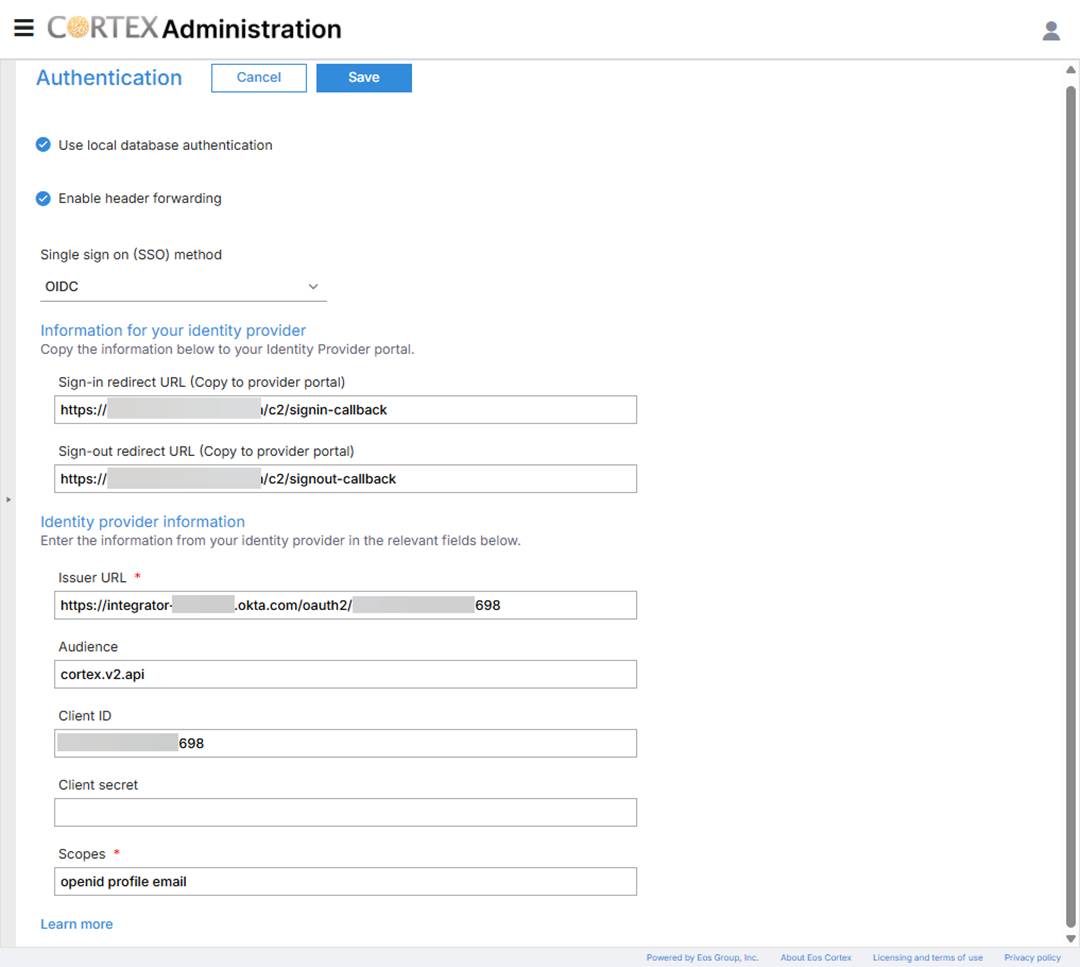
Note: We recommend leaving "Use local database authentication" enabled until the SSO settings are fully tested.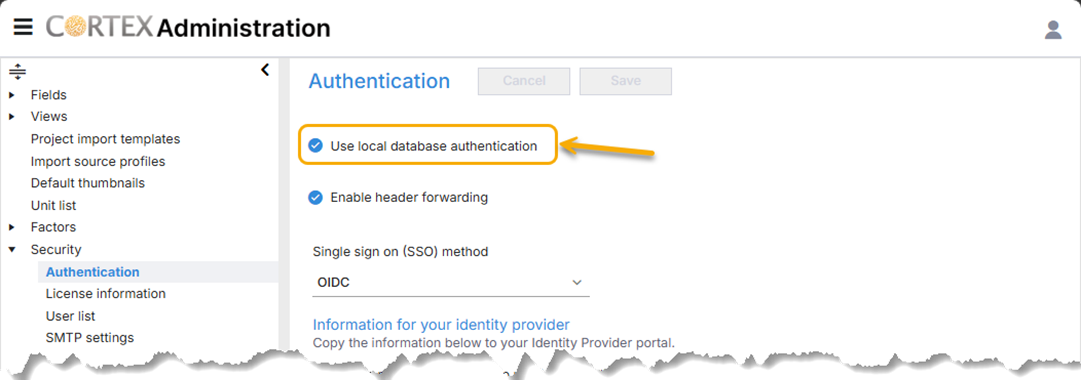
- Select Restart, to restart the Eos Cortex tenant, and the Authentication settings are saved.
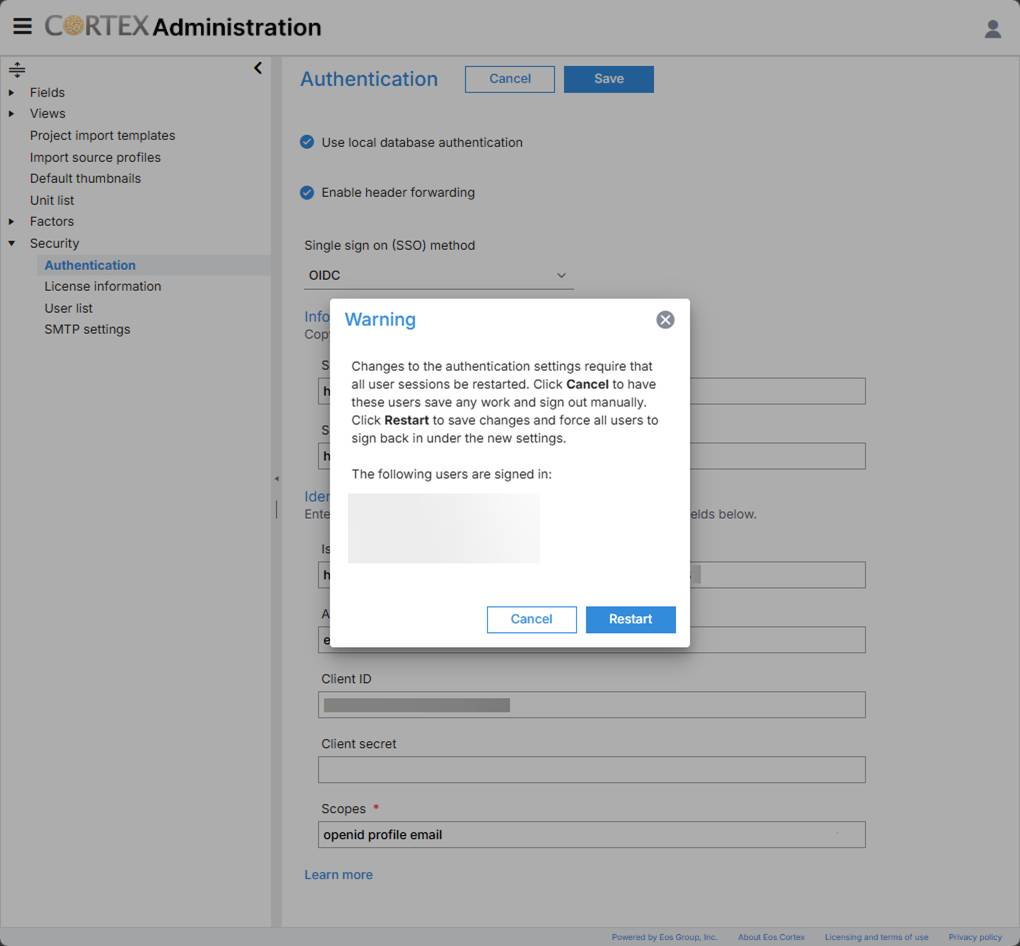
- The site will be unavailable briefly while the service restarts. After a few seconds, refresh the browser session.
example:

- Once the restart is complete, login to the Eos Cortex tenant by selecting Sign in with SSO.
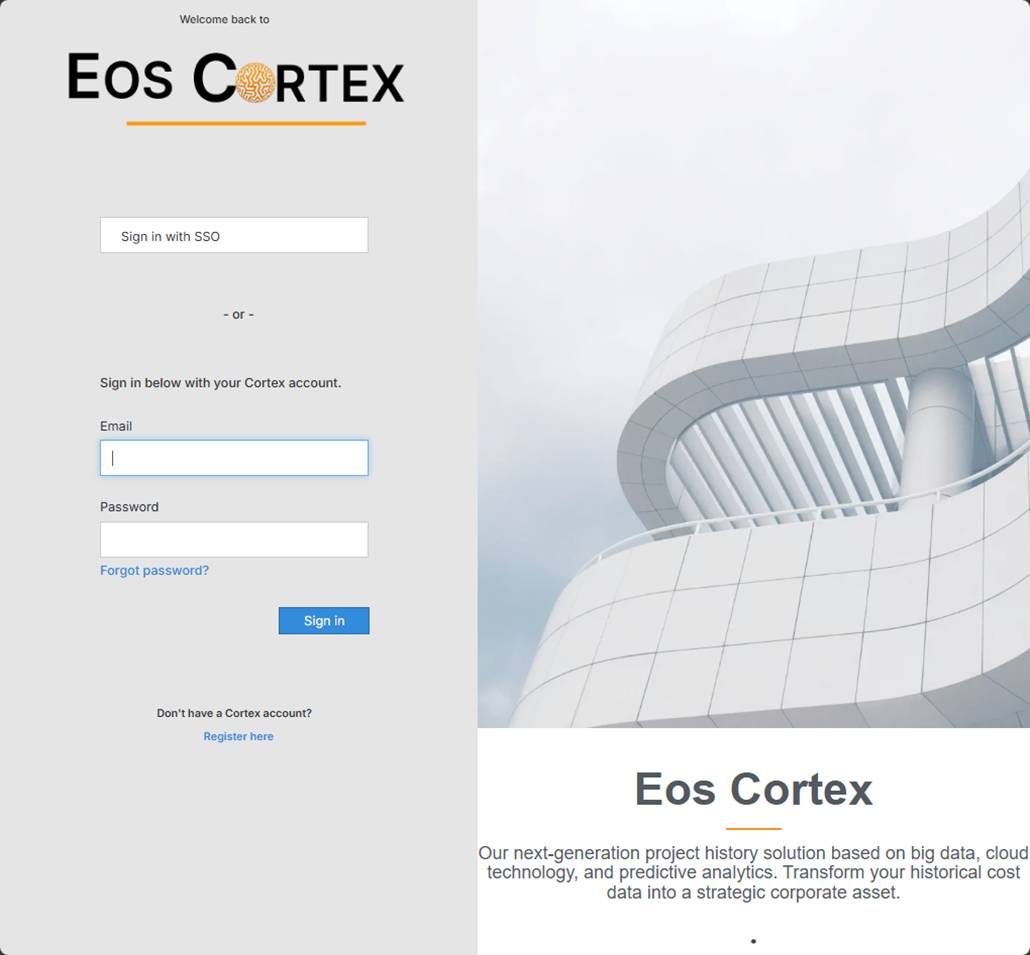
The End